In order to take advantage of the new Microsoft 365 Copilot Chat SKU as a Microsoft 365 full-stack developer, you’ll need to set up the consumption billing plan, also known as pay-as-you-go (PAYG) on your Microsoft 365 tenant. This is done by linking the billing plan up with an existing Microsoft Azure subscription.
Before you do this, you need to ensure the admin account in your Microsoft 365 tenant has the ability to manage your Azure subscription.
This article will walk you through the process of connecting your Microsoft 365 Developer Program tenant to an Azure subscription. Once that’s done, you’ll then enable the PAYG billing in your Microsoft 365 tenant.
These steps will work for any Microsoft 365 tenant, not just a tenant obtained through the Microsoft 365 Developer Program.
Grant your Microsoft 365 admin the Contributor in your Azure subscription
The first step is to ensure your Microsoft 365 administrator account has been granted the Contributor, or Owner, role in your Azure subscription.
- Start by logging into the Microsoft Azure portal with the existing account you use to access your Azure subscription(s).
- Navigate to the subscription where you want the Microsoft 365 Copilot Chat PAYG consumption to be handled:
- Azure > Subscriptions > [select the subscription]
- Ensure you have a resource group created in the subscription as that’s what will be linked to. I named mine PowerPlatform, as the PAYG consumption billing is done through Copilot Studio and thus, Power Platform.
- Assign your Microsoft 365 admin the Contributor role:
From the menu in the Azure Portal with your subscription selected, select Access control (IAM).
On the Access control (IAM) screen, select Add ⇒ Add role assignment.
On the Add role assignment screen, under the Role tab, select Privileged administrator roles, select Contributor, and then select Next:
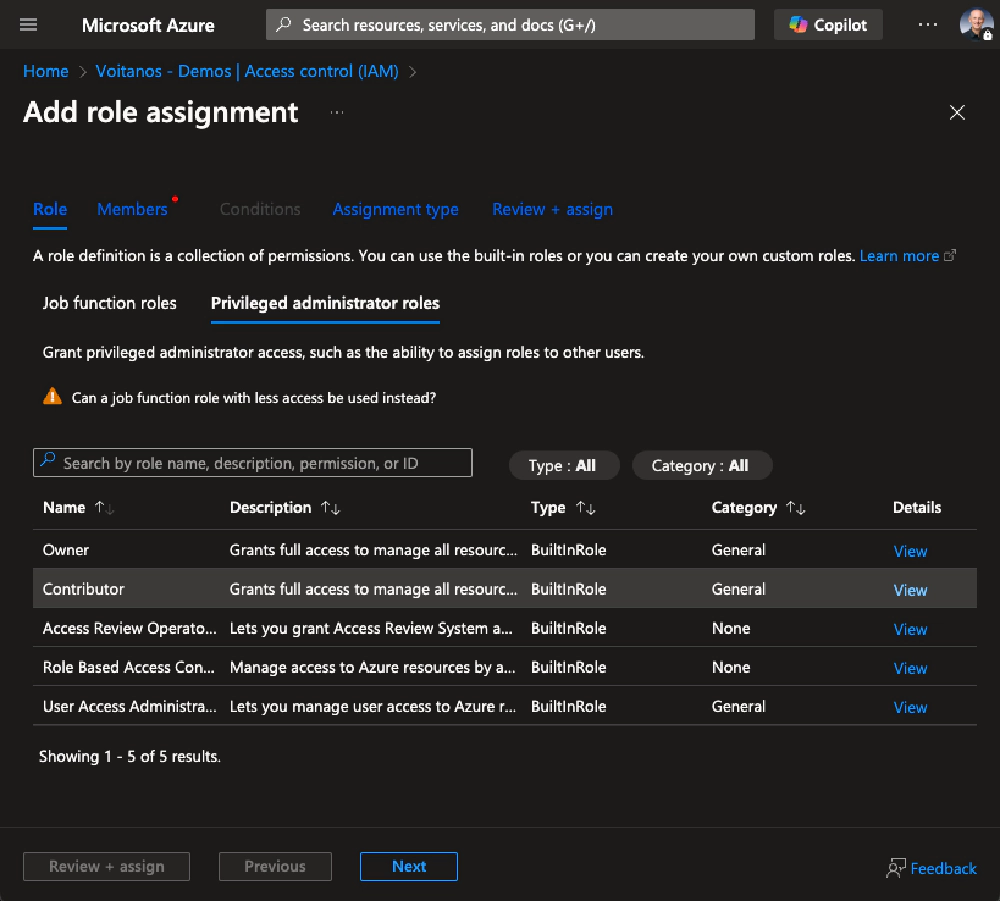
Select the Contributor role to grant a user in your Azure Subscription
On the Add role assignment screen, under the Members tab, select User, group, or service principal, then select the Select members link. Enter the user name of the user, select the Select button, then select Next:
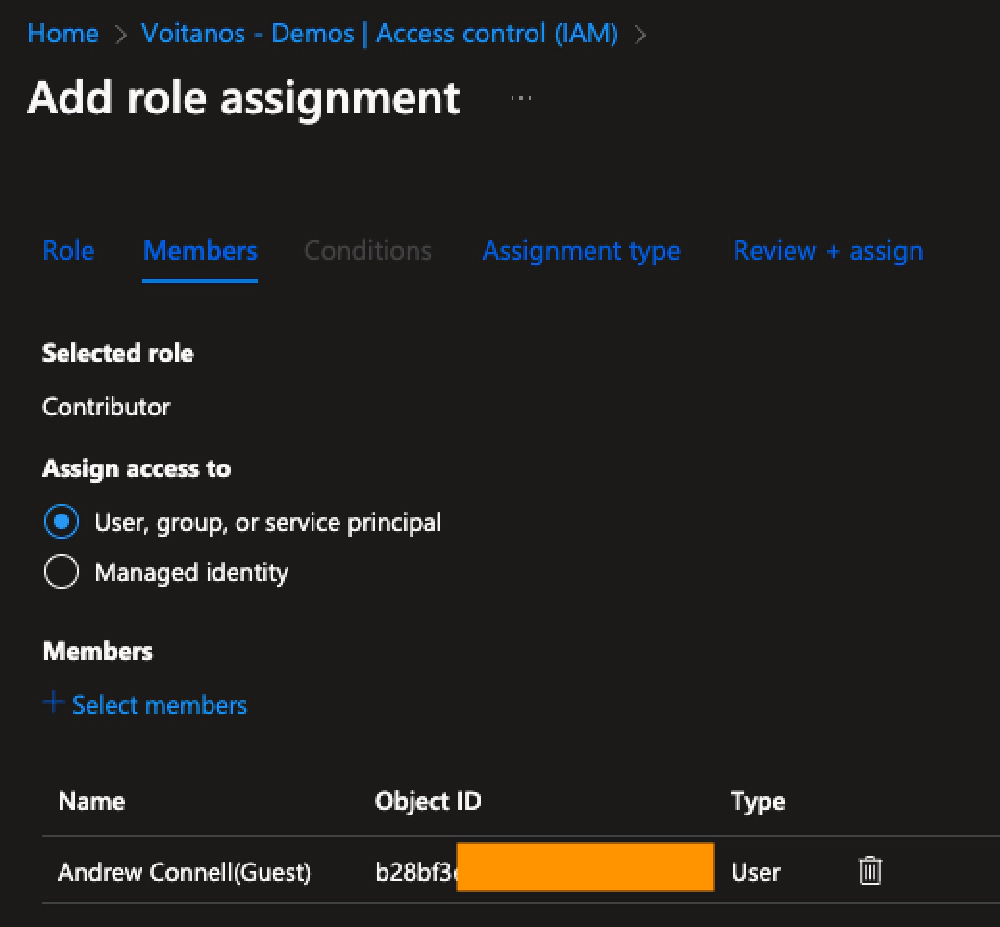
Select user to grant the Contributor role to a user
On the Assignment type, select how you want to assign them access and optionally set a duration when they can have access. What you choose here is up to you.
- If you choose Eligible for the assignment type, you’ll sent an invitation to the user. They will receive an email invitation they’ll have to accept and then activate the invitation.
- If you choose Active for the assignment type, they will immediately have access.
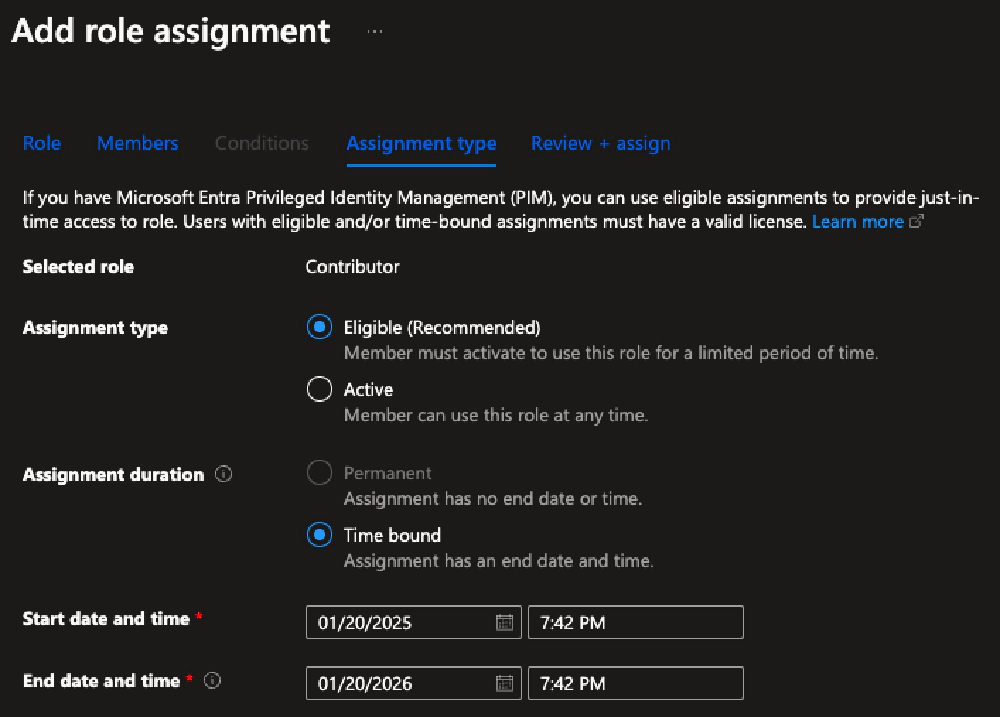
Configure how to grant the Contributor role to a user
I chose to use the Active assignment type, but made the assignment good for just 1 day as I only wanted to do one operation: set up consumption billing for the Microsoft 365 Copilot Chat.
Once you’ve made your selection, select Review + assign.
Double check that the user has the Contributor role on your subscription.
Navigate to the subscription where you want the Microsoft 365 Copilot Chat PAYG consumption to be handled:
- Azure > Subscriptions > [select the subscription]
Select Access control (IAM), then select the Check access button.
Find the user in the panel that opens and select them:

Verify the Contributor role granted to user
You should see the role you assigned to the user, as I do here:
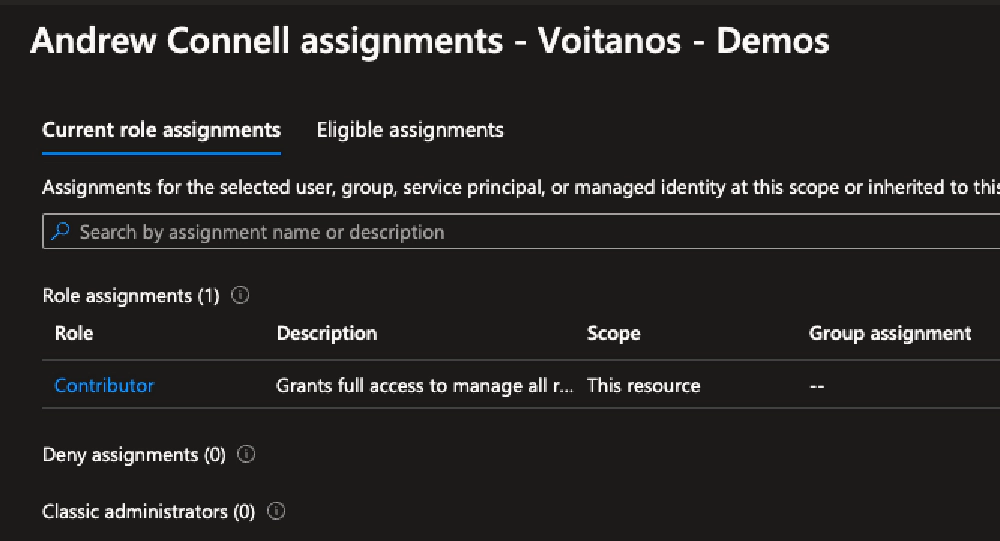
Confirm the Contributor role granted to user
With the account setup in Azure, now you can enable consumption billing for Microsoft 365 Copilot Chat.
Enable PAYG Metered Billing for Microsoft 365 Copilot Chat
If you were already signed into the Power Platform Admin Center, logout and log back in using your Microsoft 365 tenant admin account… the same one you granted the Contributor role on your Azure subscription. I found this was necessary as my Azure subscriptions wouldn’t show up under my current login.
From the Power Platform Admin Center, select the Licensing menu item.
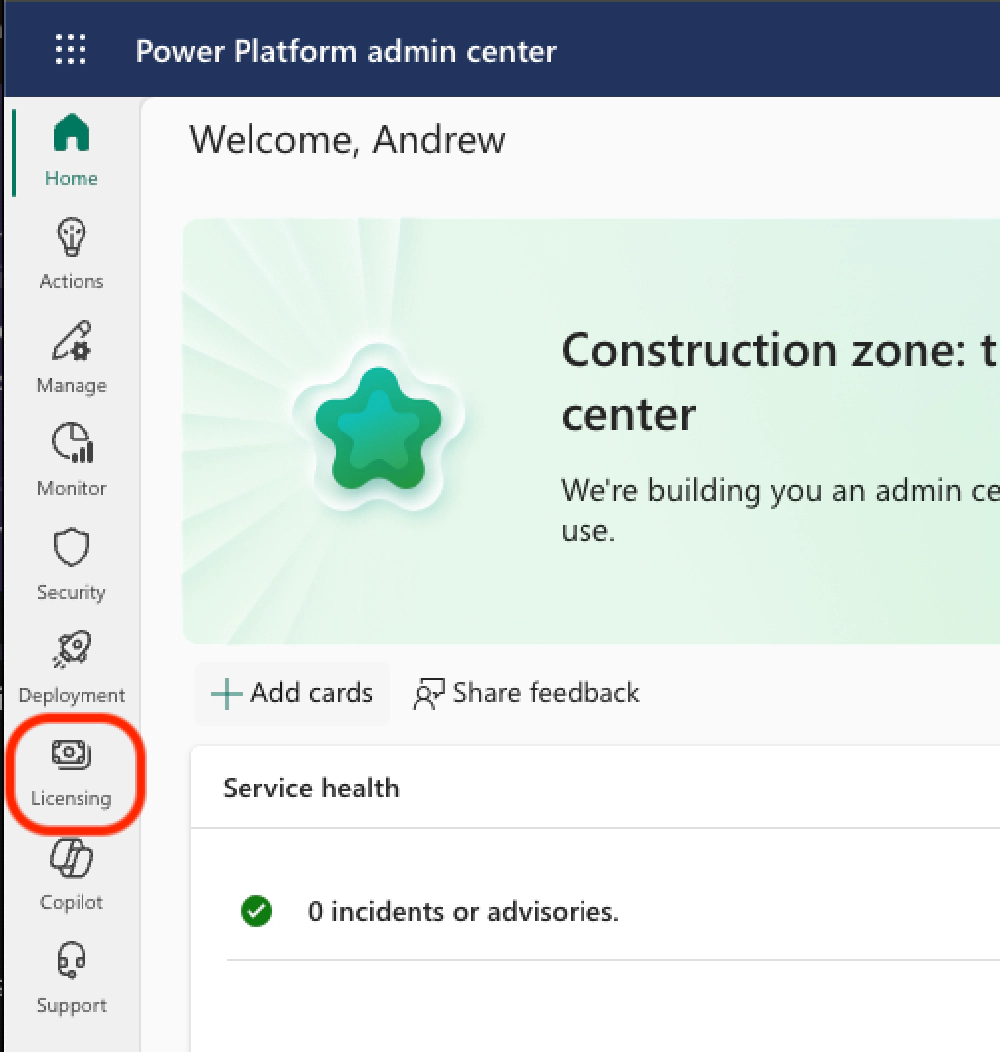
Select Licensing from the Power Platform admin center menu
On the Licensing page, select Copilot Studio from the list of products and then select New billing plan.

Select Copilot Studio to add a new billing plan
In the New billing plan panel that appears, select Microsoft 365 Copilot Chat.
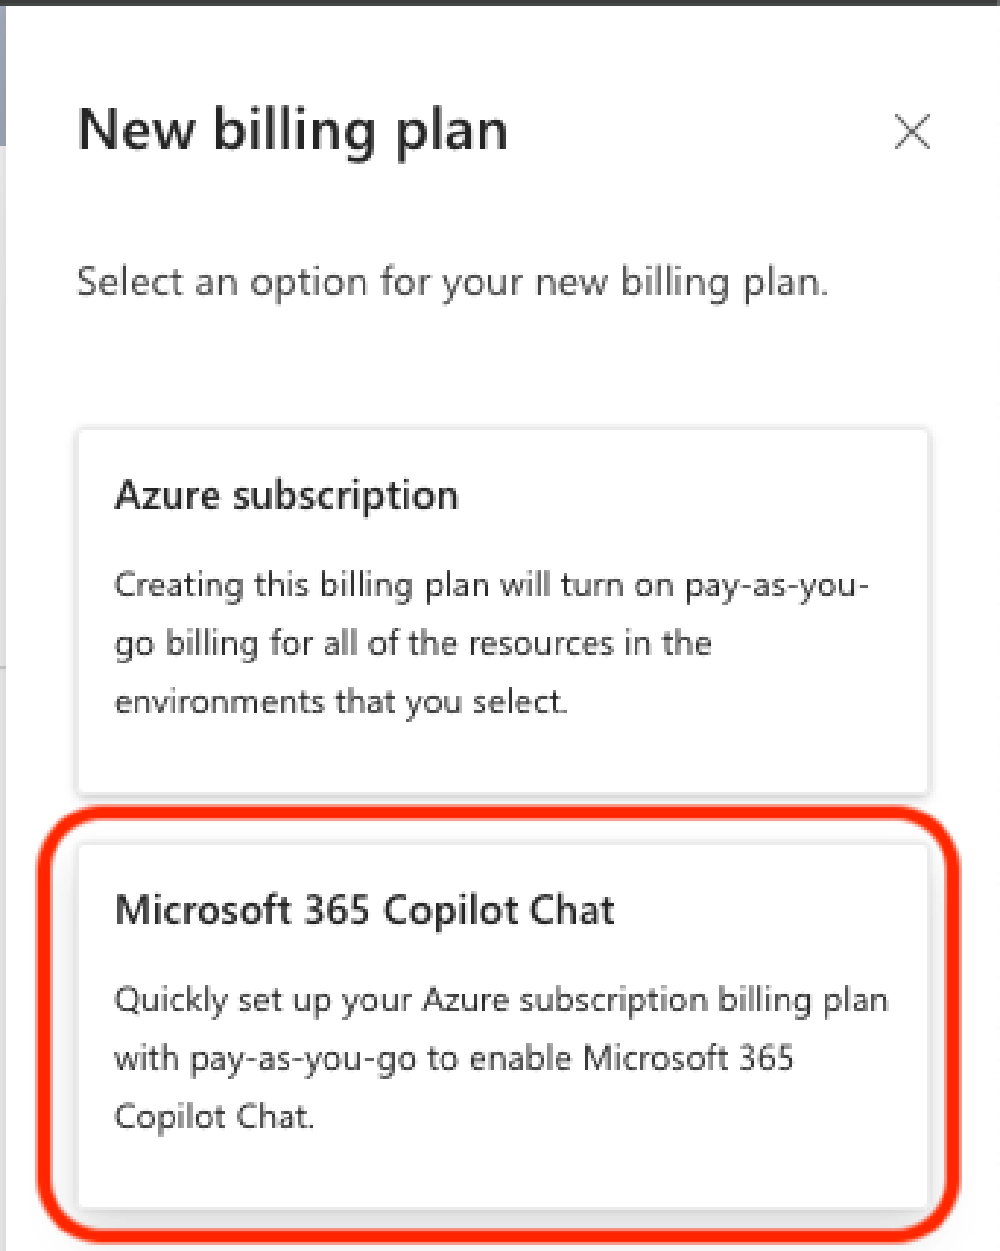
Select Microsoft 365 Copilot Chat for the type of billing plan to add
On the New billing plan for Microsoft 365 Copilot Chat, complete the form and select Next:
- Enter the Name of your billing plan - I used the same name as my Azure subscription (removing any non-alphanumeric characters).
- Select the Azure Subscription that contains the resource group want to associate the billing plan to.
- Select the Resource group you want associate the billing plan with.
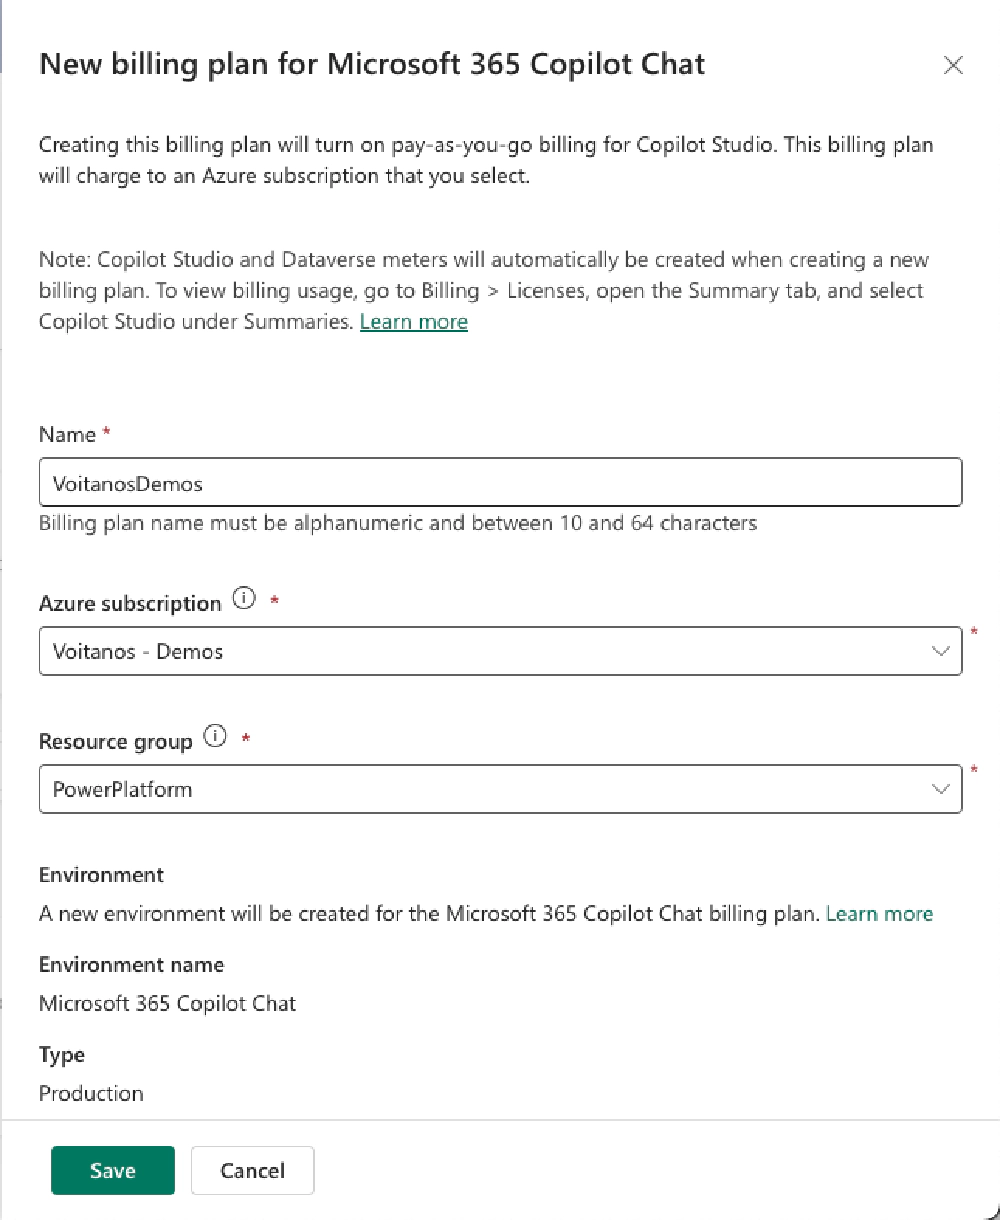
Enter the details of your new billing plan including the associated Azure resource group & subscription
It will take a few minutes to provision the billing plan. You can check the status from the Licensing > Copilot Studio > Manage Billing Plans button:
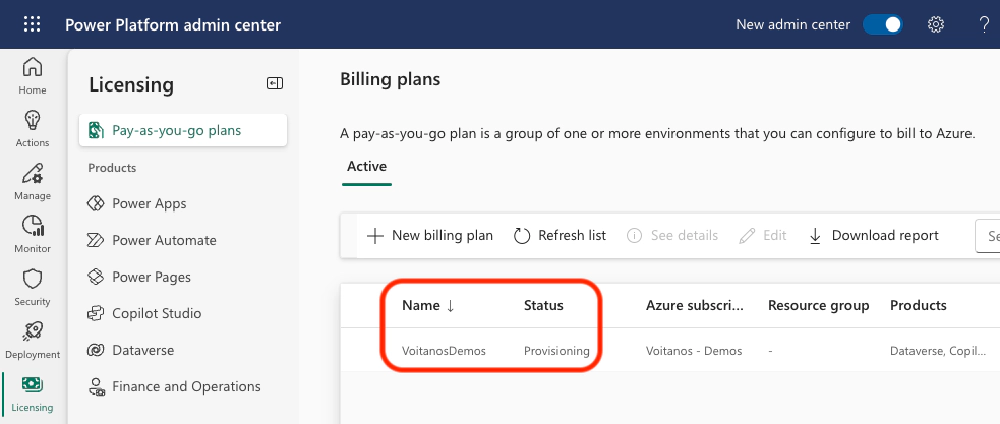
Confirm the new billing plan is provisioning
After a few minutes, you’ll see the status change to Enabled:
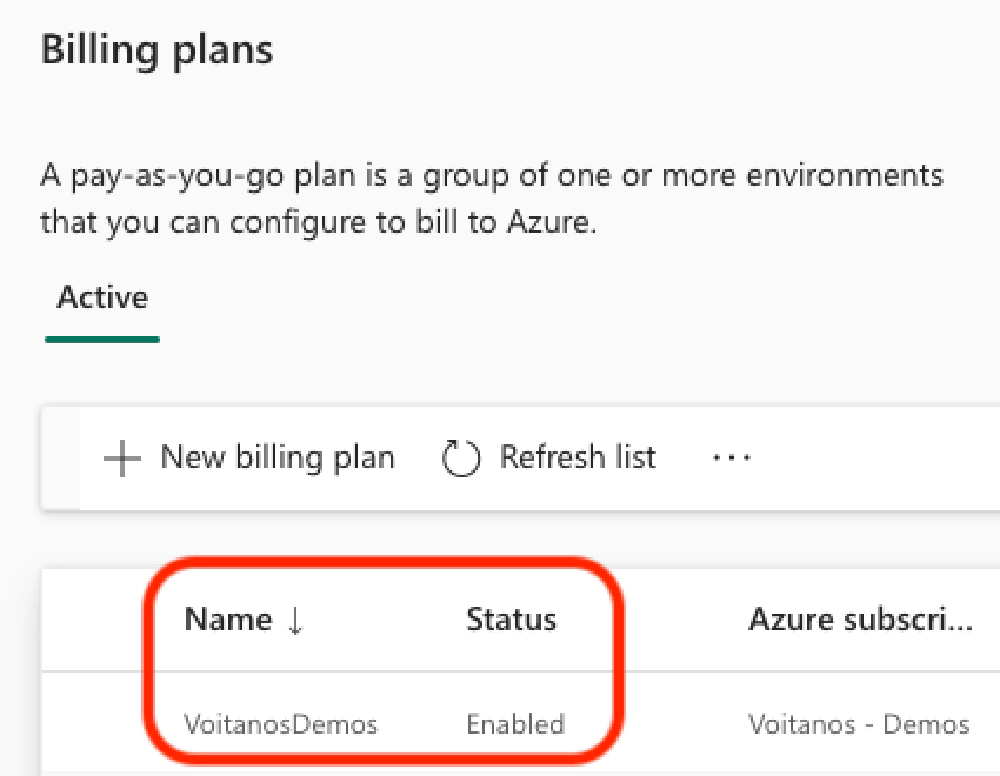
Confirm the new billing plan is enabled
That’s it! At this point, you’re now setup for PAYG metered billing and can start testing your custom agents that have work data grounding in your Microsoft 365 tenant!

Microsoft MVP, Full-Stack Developer & Chief Course Artisan - Voitanos LLC.
Andrew Connell is a full stack developer who focuses on Microsoft Azure & Microsoft 365. He’s a 21-year recipient of Microsoft’s MVP award and has helped thousands of developers through the various courses he’s authored & taught. Whether it’s an introduction to the entire ecosystem, or a deep dive into a specific software, his resources, tools, and support help web developers become experts in the Microsoft 365 ecosystem, so they can become irreplaceable in their organization.
